


Editing a section (page)
The instructions below are for editing an existing page in T4. If you want to add a new page please refer to the Adding a new section (page) guide.
Instructions
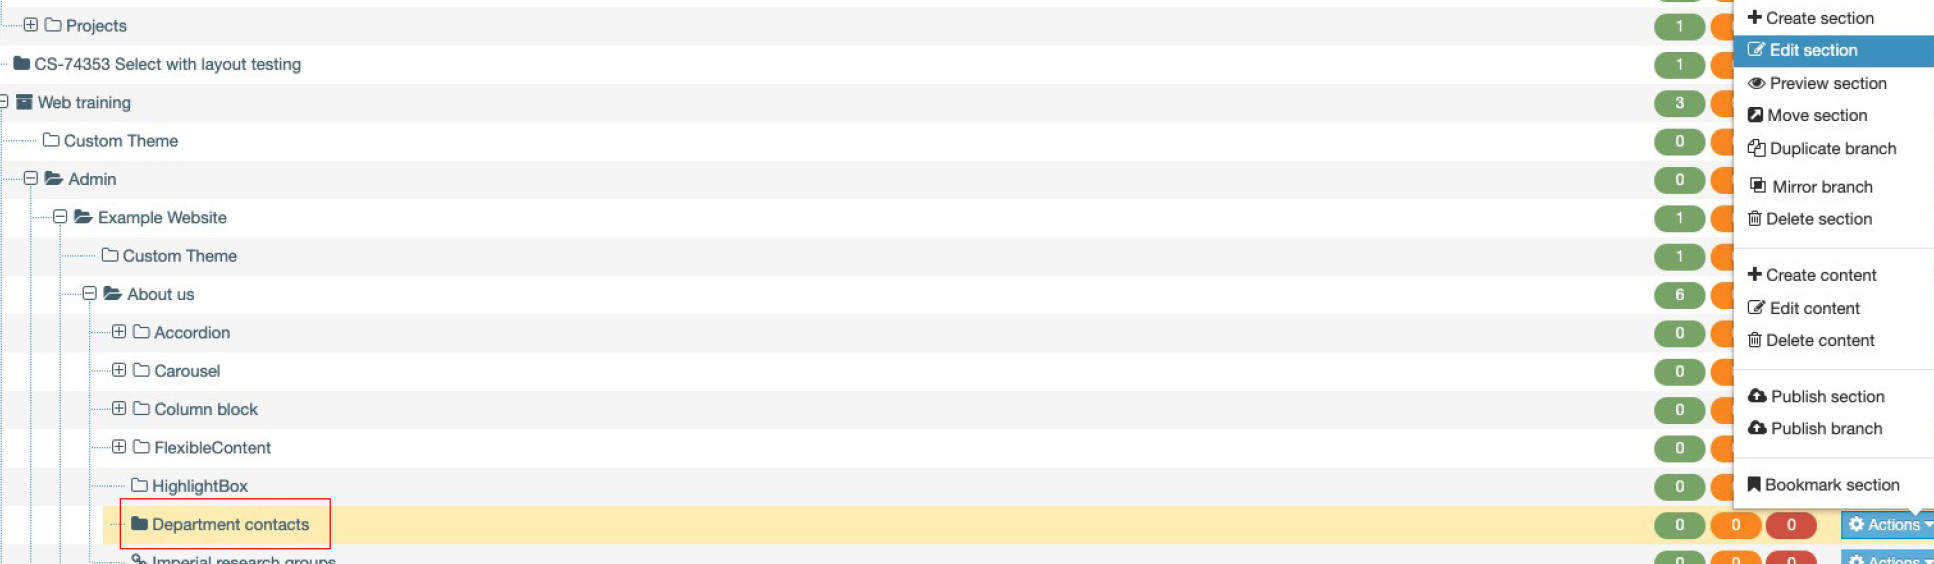
1. Go to the site structure view, you can do this by clicking on the terminalfour logo top left.
2. Hover over the section you want to modify, this will highlight in yellow.
3. Click on the blue Actions button, and click Edit section. You can also click on the name of the section in the site structure list (in this example Department contacts), this will take you to the same screen.
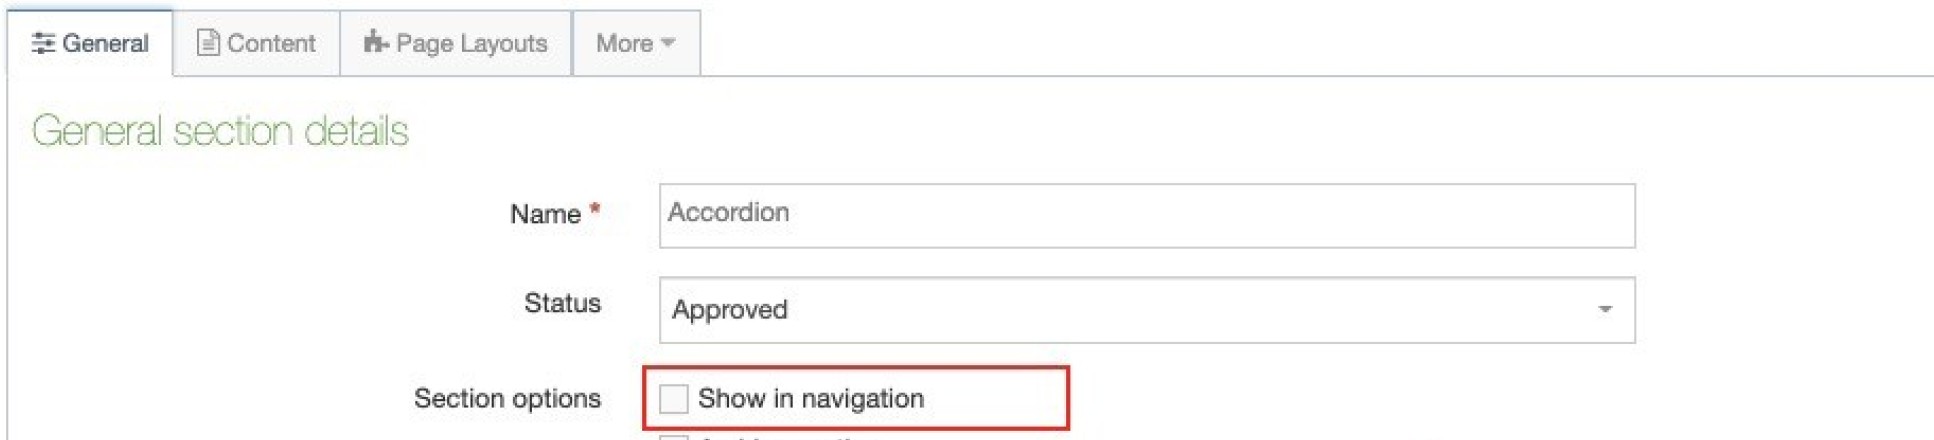
General tab
This is where you can update the general information for the section, including the Name, Output URI and Show in Navigation? as well other details covered when you first added the section to your site structure.
General tab fields
General tab fields
Name
Whatever word or phrase added in the Name field will appear as the title of the page and become the web address (URL), so this field is very important. For example, if you added Research and Innovation, that would be the page title and: /research-and-innovation/ would be the automaticly created URL. In the example above 'Department contacts' will create a URL of /department-contacts/.
Note: T4 will always hyphenate(-) separate words in the page title to form the URL, so please ensure there are no double spaces or spaces at the end of teh title, as these will become extra hyphens.
Status
There are three different statuses for a section:
- Approved - this is the default. This means that once you have added content to the page and published it, it will be live on the website.
- Pending - your page and any content will not be published and is awaiting approval. Only Approved content and sections will be published.
- Inactive - This marks your page and any sub pages (and content) for permanent deletion, known as 'purging'. Purging is done weekly on a Monday morning. Once your pages and content are purged, it is not possible to retrieve them.
Section options
- Mark as a link section (unticked by default) - this means that the new section you add will appear in your navigation as a link to another page, so it acts as a pointer and does not contain any content. Please refer to the tab below named How to create a link section for more infomration on link sections.
- Show in navigation (ticked by default) - when this is ticked (the default option), your new section will show in the navigation menus and in Google search. Of you untick this box it will hide your section (page) from navigation and it may not appear in Google searches, unless you link to the page elsewhere. See the tab How to create a hidden section below for more information on this.
- Archive section (unticked by default) - marks the section including its content and sub pages as an archive. By default, Archive Sections are not published when a site is published. An Archive Section can be used for areas of the site where publishing is not required each time a site is published, e.g., Sections where content may not change frequently.
- eForm section (unticked by default) - eForms are not used on the Imperial website, so please leave this unticked.
Description
This should be a short summary of the purpose of the page including the main infomation it contains or calls to actions. The description should contain keywords that your site visitors may be looking for if they are searching for you content via a search engine such as Google. Adding descriptions is recommended to improve the Search Engine Optimisation (SEO) of your page(s). In the example above 'A list of the key contacts in our departments' is sufficient as this page has a single purpose, providing a list of contacts for the department.
Content owner
Select the Content Owner from the list. If left blank, it will inherit from the parent section. The content owner can be used in workflows or get notified (by email) when content expires.
Output URI
In some cases a long page title might be needed but you may want a shorter URL. You can override long URLs by specifying a shorter Output URI. For example if the title was Viewing and publishing your content, it would create a URL of /viewing-and-publishing-your-content, but if you wanted a shorter URL, for example: /viewing-content then type 'viewing content' (without the /) in the Output URI field. Your URI should still be meaningful and not use acronymns, abbreviations or initialisms if possible. Please see best practice for URLs.
SEO Key phrases
Add a comma separated list of the key subjects or topics your content covers. Adding these won't improve your search ranking as they are only used as an aid to SEO reporting from within T4. If you add keywords for your pages e.g. medicine, study, apply etc. then the SEO report will assess your pages according to those keywords. For example it will report how many times those words appear on your pages. This is useful if you plan to analyse the SEO performance of your pages.
There are other factors that influence the ranking your page/site will achieve in search engines, so to please visit the section on increasing the visibility of your website in our web skills area to find out more.
Default workflow and Access key
Leave these as they are as these features are not currently available.
How to create a hidden section
There are two reasons why you would create a hidden section.
- You may want a page that you want to be accessible by typing the URL in the address bar, but not to be shown in the navigation. For example, a page that may contain a short-term promotion aimed at a small number of people. Hide the section if this is the case.
- You are using a content type that requires a repository of additional resources. Some of the content types that you use on t4 require you to create a hidden section. This section will just act as a special container to hold content together in one place (items for an accordion for example).
The procedure for creating these special hidden sections (folders) is covered in the relevant content type instructions.
Instructions
To create hidden sections, you just need to:
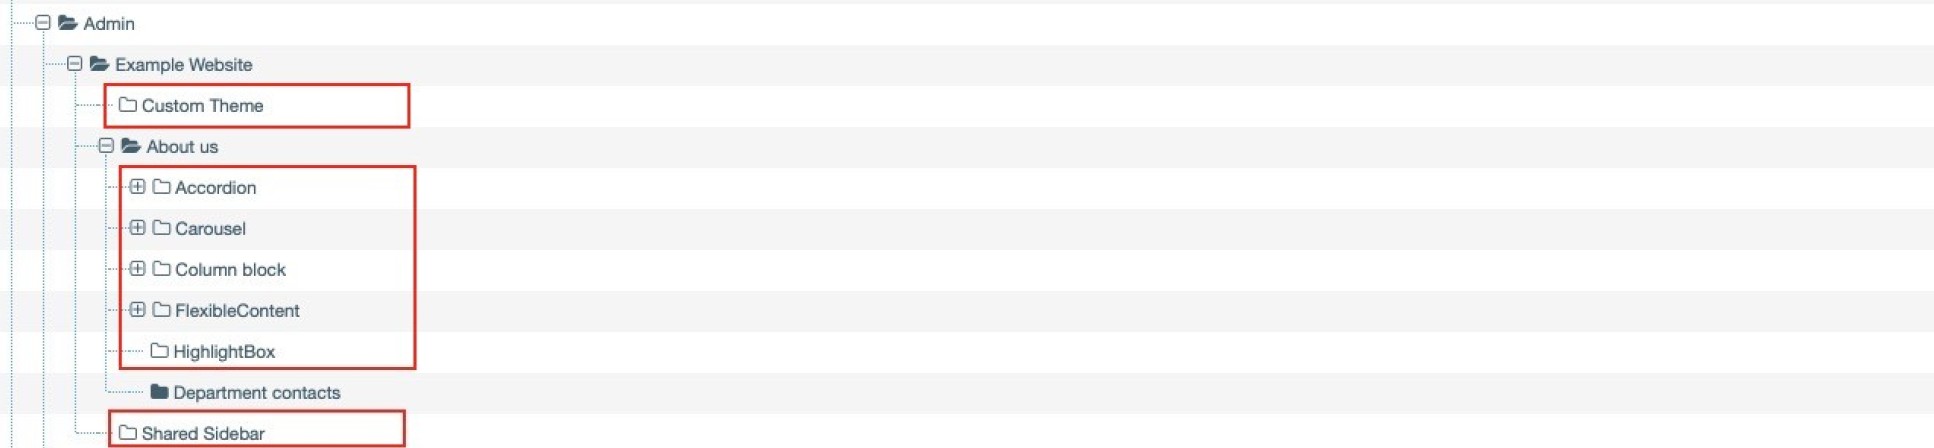
1. Uncheck the box 'Show in navigation?' when you create or edit a section. When you view the section within your site structure overview it ihas a white folder icon, rather than the normal black folder.
 2. Click Save changes at the bottom of the screen.
The image below highlights the hidden sections with the white folder icon. The other sections such as Admin, Example Website, About us and Department contacts, are all se to show in the navigation as they have a black folder option.

Content tab
This is the first tab that will open when you edit a section and is where you can add new content and view the current list of content types that have been added. You can add new content types by clicking Add content or you can modify any of the existing ones by clicking on them or by clicking on the corresponding Actions button and selecting Edit content. There are instructions for using each of the content types.

Page Layouts tab
This is where the template used by your section is defined. Please contact your Faculty Web Officer to discuss updating a page layout for a particular section. Find out more about choosing the right template
More tab
When clicking on this tab it extends to give you the following options:
- Metadata - Ignore this option.
- Edit Rights - This is where editing access can be granted for a particular section. You can search for editors who possess a lower permission level (moderators can search and add contributors) and then add them to the section. Please contact your Faculty Web Officer to discuss editing rights for moderators or for other user groups.
- Child sections - View the sections that have been added beneath this section in your site structure. Find out more about How to reorder sections in your navigation.
- Access - Restrict access to who can view particular sections or files on your site. Find out more about restricting access to your content.